
Unlocking the Secrets: How to Draw Tattoo Roses Step by Step
Intrigued by the captivating beauty of tattoo roses and eager to learn how to bring them to life on paper? You’ve landed in the right place. This comprehensive guide will take you on a journey from basic shapes to stunning, intricate rose tattoo designs. Whether you’re a budding artist or a seasoned illustrator looking to expand your repertoire, we’ll break down the process of how to draw tattoo roses step by step, ensuring you gain the skills and confidence to create your own unique masterpieces. Our aim is not just to teach you the mechanics, but to help you understand the artistry behind these iconic symbols.
This guide offers something different: a blend of technical instruction and artistic insight, designed to empower you with both the ‘how’ and the ‘why’ of rose tattoo art. We’ll explore various styles, delve into shading techniques, and provide tips gleaned from years of experience observing professional tattoo artists. Prepare to unlock your creative potential and transform your artistic vision into reality.
Mastering the Fundamentals: Essential Supplies and Basic Shapes
Before diving into the intricacies of rose petals and thorny stems, let’s gather the necessary tools and lay the groundwork with fundamental shapes. Having the right materials and understanding basic forms will dramatically improve your drawing process and the final result.
- Essential Supplies: You’ll need a good quality sketchbook or drawing paper, a set of pencils (ranging from 2H to 6B), an eraser (preferably a kneaded eraser for precise corrections), and a fine-liner pen for outlining. Some artists also prefer using blending stumps or tortillions for smoother shading.
- Basic Shapes: The foundation of any rose drawing lies in simple geometric shapes. Start with a circle for the overall head of the rose and a teardrop shape for the central bud. These shapes serve as a guide for placing petals and establishing the rose’s structure.
Understanding the interplay of these shapes is crucial. The circle dictates the overall size and roundness of the rose, while the teardrop determines the direction and form of the central bud. Experiment with different sizes and orientations of these shapes to create variations in your rose designs.
Step-by-Step Guide: Drawing a Classic Tattoo Rose
Now, let’s embark on a step-by-step journey to create a classic tattoo rose. We’ll break down the process into manageable steps, focusing on building the rose layer by layer.
- Step 1: The Central Bud: Begin by drawing a tight, closed teardrop shape in the center of your circle. This will form the core of the rose. Add a few curved lines around the base of the teardrop to suggest the initial tightly wound petals.
- Step 2: Inner Petals: Surround the central bud with smaller, overlapping petals. These petals should curve inwards, creating a sense of depth and dimension. Vary the size and shape of these petals to add realism.
- Step 3: Middle Petals: Gradually increase the size of the petals as you move outwards. These petals should be more open and flowing, with slightly ruffled edges. Remember to overlap the petals to create a layered effect.
- Step 4: Outer Petals: The outer petals are the largest and most dramatic. These petals should curve outwards, revealing the full bloom of the rose. Add subtle folds and creases to these petals to enhance their realism.
- Step 5: Adding the Stem and Leaves: Draw a stem extending downwards from the base of the rose. Add thorns along the stem for a classic tattoo touch. Include a few leaves, varying their size and shape, to complete the composition.
- Step 6: Outlining and Shading: Once you’re satisfied with the overall structure, use a fine-liner pen to outline the rose. Vary the thickness of the lines to create visual interest. Add shading to the petals to create depth and dimension. Use darker shading in the inner petals and lighter shading in the outer petals.
Exploring Different Rose Tattoo Styles
The beauty of tattoo roses lies in their versatility. They can be adapted to various styles, each with its unique aesthetic and appeal. Let’s explore some popular styles:
- Traditional Tattoo Roses: Characterized by bold outlines, vibrant colors, and simple shading. These roses often feature iconic elements like banners, daggers, or skulls.
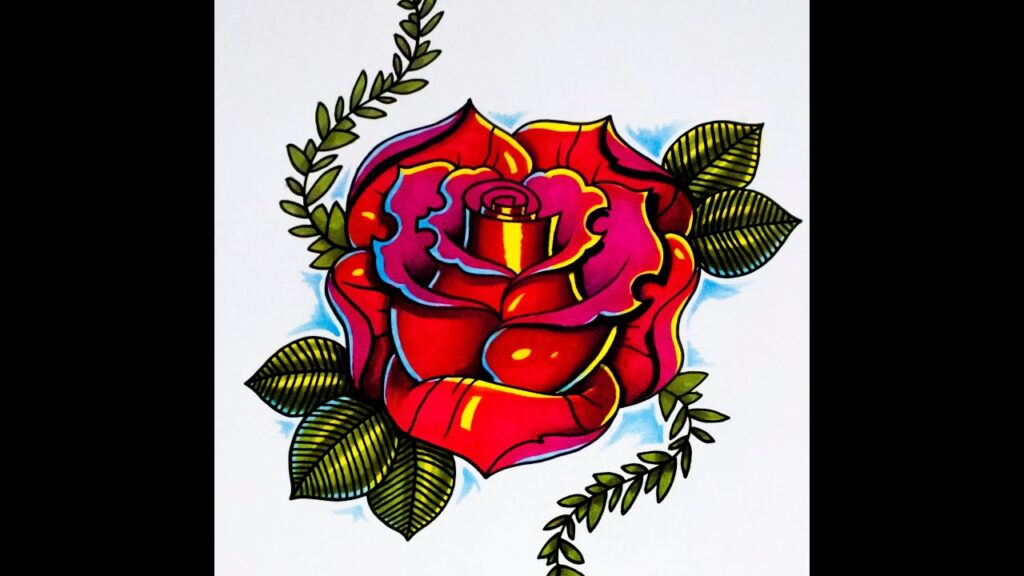
- Neo-Traditional Tattoo Roses: A modern take on the traditional style, featuring bolder lines, more intricate details, and a wider range of colors.
- Realism Tattoo Roses: Aiming for a photorealistic depiction of roses, with meticulous attention to detail, shading, and texture.
- Watercolor Tattoo Roses: Creating a soft, ethereal effect using watercolor-inspired techniques, with vibrant colors blending seamlessly together.
- Black and Grey Tattoo Roses: Focusing on intricate shading and linework to create depth and dimension using only black and grey ink.
Experiment with different styles to find your own unique voice. Each style offers a different approach to capturing the beauty and essence of the rose.
Mastering Shading Techniques for Depth and Realism
Shading is the key to creating depth, dimension, and realism in your rose drawings. Understanding different shading techniques will elevate your artwork and bring your roses to life.
- Hatching: Creating tonal variations by drawing closely spaced parallel lines. The closer the lines, the darker the shade.
- Cross-Hatching: Similar to hatching, but with intersecting lines to create darker shades and more complex textures.
- Stippling: Using dots to create tonal variations. The denser the dots, the darker the shade.
- Blending: Creating smooth transitions between different shades using a blending stump or tortillion.
Practice these techniques on scrap paper before applying them to your rose drawings. Experiment with different pressures and angles to achieve different effects. Remember that shading is about creating contrast and highlighting the form of the rose.
Adding Unique Elements and Personal Touches
Once you’ve mastered the basic techniques, it’s time to add your own unique elements and personal touches to your rose designs. This is where your creativity can truly shine.
- Experiment with Color: Don’t be afraid to experiment with different colors, whether you’re using traditional tattoo colors or a more modern palette.
- Incorporate Other Elements: Add other elements like banners, daggers, skulls, or butterflies to create a more complex and meaningful composition.
- Vary the Rose’s Form: Experiment with different rose varieties, from tightly closed buds to fully bloomed roses.
- Add Textures and Patterns: Incorporate textures and patterns into your rose petals to create visual interest.
Remember that the most important aspect of art is self-expression. Let your personality shine through in your rose designs.
The Significance of Rose Tattoos: Symbolism and Meaning
Rose tattoos are more than just beautiful designs; they carry deep symbolism and meaning. Understanding the symbolism behind rose tattoos can add another layer of depth to your artwork.
- Love and Passion: Roses are often associated with love, passion, and romance.
- Beauty and Perfection: Roses are symbols of beauty, perfection, and grace.
- Hope and New Beginnings: Roses can also represent hope, new beginnings, and fresh starts.
- Loss and Remembrance: In some cultures, roses are used to commemorate loss and remember loved ones.
The color of the rose can also influence its meaning. Red roses symbolize love and passion, white roses symbolize purity and innocence, yellow roses symbolize friendship and joy, and black roses symbolize death and mourning.
Essential Tools and Resources for Aspiring Tattoo Artists
If you’re serious about pursuing a career as a tattoo artist, it’s essential to invest in the right tools and resources. Here are some recommendations:
- Tattoo Machines: Rotary machines are known for their smooth operation and versatility, while coil machines offer a more traditional feel and are favored by some artists for their power.
- Needles and Tubes: Use high-quality needles and tubes to ensure clean and precise lines.
- Inks: Choose reputable ink brands that are known for their vibrant colors and long-lasting results.
- Practice Skin: Practice on synthetic skin before tattooing real people.
- Mentorship: Seek guidance from experienced tattoo artists to learn the ropes and develop your skills.
Furthermore, consider investing in tattoo drawing software such as Procreate or Adobe Photoshop to experiment with various styles and techniques digitally. These tools can significantly enhance your creative process and allow for easier modifications and refinements.
Avoiding Common Mistakes When Drawing Tattoo Roses
Even experienced artists can fall prey to common mistakes when drawing tattoo roses. Being aware of these pitfalls can help you avoid them and improve your artwork.
- Proportion Issues: Ensure that the petals are proportionate to each other and to the overall size of the rose.
- Lack of Depth: Create depth by overlapping petals and using shading to create contrast.
- Inconsistent Linework: Vary the thickness of your lines to create visual interest and emphasize certain areas of the rose.
- Overcomplicating the Design: Keep the design simple and focus on the essential elements of the rose.
By avoiding these common mistakes, you can create more realistic and visually appealing rose drawings.
The Enduring Allure of Rose Tattoos
Learning how to draw tattoo roses step by step unlocks a world of artistic possibilities. From understanding basic shapes to mastering shading techniques and exploring different styles, the journey is both challenging and rewarding. The enduring allure of rose tattoos lies in their timeless beauty, rich symbolism, and versatility. As leading tattoo artists often emphasize, the key is practice, patience, and a passion for the art form. Embrace the process, experiment with different techniques, and let your creativity blossom.
Ready to take your rose tattoo art to the next level? Share your creations and connect with fellow artists in the comments below. We encourage you to explore advanced shading tutorials or delve into the history of traditional tattoo artistry to further refine your skills.
