Crafting Your Own Henna Tattoo: A Complete Guide to Recipes and Techniques
Intrigued by the beautiful artistry of henna tattoos? Want to create stunning temporary body art from the comfort of your own home? You’ve come to the right place. This comprehensive guide provides everything you need to know about creating your own henna tattoo recipe, from understanding the essential ingredients to mastering application techniques. We’ll delve into the nuances of henna powder, explore different liquid options, and share expert tips for achieving rich, long-lasting stains. Whether you’re a beginner or an experienced artist, this article will equip you with the knowledge and confidence to create breathtaking henna designs.
Understanding Henna: The Foundation of Your Tattoo Recipe
Before diving into specific recipes, it’s crucial to understand the core ingredient: henna powder. Henna, also known as Lawsonia inermis, is a flowering plant whose leaves contain a dye molecule called lawsone. When properly prepared, lawsone binds to the protein in the skin, resulting in a temporary stain. The quality of your henna powder directly impacts the darkness and longevity of your tattoo. Finely sifted powder, often referred to as henna for body art (BAQ henna), is essential for smooth application and optimal staining.
Choosing the Right Henna Powder:
- Source: Opt for henna powder from reputable suppliers who specialize in body art quality henna.
- Sift: Ensure the powder is finely sifted to prevent clogging your applicator.
- Color: Fresh henna powder typically has a greenish-brown hue. Avoid powders that are reddish or have a musty odor, as they may be old or adulterated.
- Testing: Perform a small patch test on your skin before applying henna extensively to check for any allergic reactions.
Essential Ingredients for a Perfect Henna Paste
A basic henna tattoo recipe consists of henna powder, a liquid, and an essential oil. The liquid helps to create a smooth paste, while the essential oil enhances the dye release and improves the stain’s darkness. Let’s explore each ingredient in detail:
Liquid Options: From Lemon Juice to Tea
The liquid you choose plays a crucial role in the consistency and staining power of your henna paste. Here are some popular options:
- Lemon Juice: A classic choice, lemon juice provides acidity that aids in dye release. Use freshly squeezed lemon juice for best results.
- Lime Juice: Similar to lemon juice, lime juice can also be used. However, it’s slightly more acidic, so use it sparingly, especially if you have sensitive skin.
- Tea: Strong brewed black tea or rooibos tea can be used as a liquid. Tea adds tannins, which can contribute to a richer stain.
- Water: While water can be used, it generally doesn’t yield as dark a stain as acidic liquids.
The Magic of Essential Oils: Terpenes and Stain Enhancement
Essential oils are more than just fragrances; they contain terpenes, which help to break down the cell walls of the henna leaves, releasing more dye and enhancing the stain. Not all essential oils are suitable for henna; choose those that are high in terpenes and safe for skin application.
Top Essential Oil Choices for Henna:
- Lavender Essential Oil: Known for its calming properties, lavender oil also has a high terpene content.
- Tea Tree Essential Oil: Another excellent choice with antiseptic properties.
- Cajeput Essential Oil: This oil has a strong, medicinal scent and is highly effective at enhancing dye release.
- Eucalyptus Essential Oil: Use with caution, as it can be irritating to some people’s skin.
Important Note: Always use 100% pure essential oils. Avoid fragrance oils or synthetic blends, as they can irritate the skin and won’t enhance the stain.
Crafting Your Henna Tattoo Recipe: Step-by-Step Guide
Now that you understand the essential ingredients, let’s create a basic henna tattoo recipe. This recipe is a starting point; you can adjust the proportions to suit your preferences.
Basic Henna Paste Recipe:
- 100 grams BAQ henna powder
- Approximately ¼ cup lemon juice (adjust as needed)
- 20-30 ml essential oil (lavender, tea tree, or cajeput)
- Sugar (optional, for smoother paste)
Instructions:
- Sift the henna powder: This removes any clumps and ensures a smooth paste.
- Mix liquid and essential oil: In a glass bowl, combine the lemon juice and essential oil.
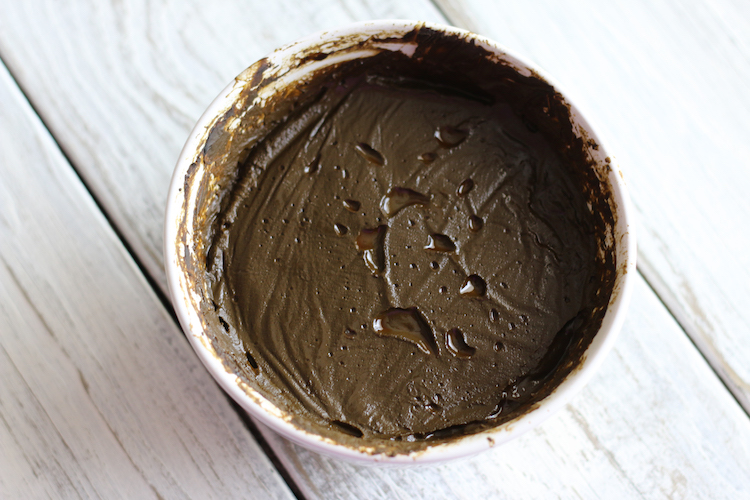
- Gradually add the liquid to the henna powder: Stir continuously until you achieve a thick, yogurt-like consistency. Add more liquid if needed, a little at a time.
- Add sugar (optional): A teaspoon of sugar can make the paste smoother and easier to apply.
- Cover and let it rest: Cover the bowl tightly with plastic wrap and let it rest at room temperature for 12-24 hours. This allows the dye to release from the henna powder.
- Check for dye release: After the resting period, check for dye release by dabbing a small amount of paste onto your palm. If it leaves an orange stain within a few minutes, the paste is ready.
- Adjust consistency (if needed): If the paste is too thick, add a few drops of liquid. If it’s too thin, add a small amount of henna powder.
The Art of Application: Achieving Stunning Henna Designs
Once your henna paste is ready, it’s time to apply it to your skin. Here are some tips for achieving beautiful and intricate designs:
Choosing Your Applicator: Cones, Bottles, and More
The applicator you choose depends on your skill level and the complexity of your design.
- Henna Cones: Pre-rolled henna cones are a popular choice for beginners. They provide good control and are easy to handle.
- Applicator Bottles: Bottles with fine tips are ideal for creating intricate lines and patterns.
- Syringes: Syringes without needles can be used for precise application, especially for filling in larger areas.
Preparing Your Skin: A Clean Canvas for Art
Proper skin preparation is essential for optimal staining. Follow these steps:
- Cleanse the area: Wash the area where you’ll be applying henna with soap and water.
- Exfoliate (optional): Gently exfoliating the skin can help to remove dead cells and improve stain penetration.
- Avoid lotions and oils: Do not apply any lotions or oils to the area before applying henna.
Applying the Henna: Techniques for Precision and Detail
Practice makes perfect! Start with simple designs and gradually work your way up to more complex patterns.
- Hold the applicator like a pen: Maintain a steady hand and apply gentle pressure to release the paste.
- Create smooth, even lines: Avoid dragging the applicator across the skin. Instead, let the paste flow naturally.
- Use stencils (optional): Stencils can be helpful for creating intricate designs, especially if you’re a beginner.
- Correct mistakes immediately: Use a cotton swab or damp cloth to wipe away any mistakes before the henna dries.
Aftercare: Maximizing Your Henna Tattoo’s Longevity
Proper aftercare is crucial for achieving a dark, long-lasting stain. Follow these tips:
Keeping It Moist: Sugar Sealing for Enhanced Staining
Applying a sugar sealant helps to keep the henna paste moist and in contact with the skin for longer, resulting in a darker stain.
Sugar Sealant Recipe:
- 1 part sugar
- 2 parts lemon juice
Mix the sugar and lemon juice until the sugar dissolves. Gently dab the sealant onto the henna paste every 15-20 minutes.
Warmth and Darkness: Creating the Ideal Environment
Warmth helps to speed up the staining process. Keep the hennaed area warm by wrapping it in a bandage or wearing loose clothing.
The Waiting Game: Patience for a Richer Stain
Leave the henna paste on for as long as possible, ideally 2-6 hours. The longer it stays on, the darker the stain will be.
Removing the Paste: Gentle Techniques for Best Results
Avoid washing the area with water immediately after removing the paste. Instead, gently scrape off the dried paste with a dull object, such as a credit card.
Oil Application: Locking in the Color
Apply a natural oil, such as coconut oil or olive oil, to the area after removing the paste. This helps to moisturize the skin and protect the stain.
Avoiding Water: The First 24 Hours
Avoid washing the area with soap and water for the first 24 hours after removing the paste. Water can interfere with the oxidation process and fade the stain.
Troubleshooting: Common Henna Problems and Solutions
Even with the best henna tattoo recipe and application techniques, you may encounter some challenges. Here are some common problems and solutions:
Faint Stain: Unlocking the Secrets to Darker Results
If your henna stain is faint, consider the following:
- Henna Powder Quality: Ensure you’re using fresh, high-quality BAQ henna powder.
- Dye Release: Make sure the henna paste has properly released its dye before application.
- Aftercare: Follow the aftercare instructions carefully, especially keeping the henna paste moist and warm.
- Skin Type: Dry skin may not absorb the henna as well as oily skin. Exfoliate and moisturize your skin regularly.
Allergic Reactions: Identifying and Preventing Skin Sensitivities
Although rare, allergic reactions to henna can occur. Always perform a patch test before applying henna extensively.
Symptoms of an Allergic Reaction:
- Itching
- Redness
- Swelling
- Blisters
If you experience any of these symptoms, remove the henna paste immediately and consult a doctor.
Paste Consistency: Achieving the Perfect Flow
The consistency of your henna paste is crucial for smooth application. If the paste is too thick, it will be difficult to apply. If it’s too thin, it will run and smudge.
Adjusting Paste Consistency:
- Too Thick: Add a few drops of liquid (lemon juice, tea, or water) until you achieve the desired consistency.
- Too Thin: Add a small amount of henna powder until the paste thickens.
Henna Beyond the Basics: Exploring Variations and Advanced Techniques
Once you’ve mastered the basics, you can experiment with different variations of the henna tattoo recipe and explore advanced techniques.
Jagua Henna: The Black Henna Alternative
Jagua is a natural fruit extract that produces a temporary black stain on the skin. It’s often used as an alternative to black henna, which is illegal and dangerous due to the addition of chemical dyes.
Henna Freckles: A Trendy and Temporary Beauty Statement
Henna freckles are a fun and temporary way to add a touch of whimsy to your look. Simply apply small dots of henna paste to your face and let them stain for a few hours.
White Henna: Creating Stunning Bridal Designs
White henna is not actually henna; it’s a body paint or adhesive that is used to create temporary white designs on the skin. It’s popular for bridal henna and special occasions.
The Enduring Beauty of Henna
Creating your own henna tattoos is a rewarding and creative process. By understanding the essential ingredients, mastering application techniques, and following proper aftercare, you can achieve stunning and long-lasting results. Experiment with different recipes, explore advanced techniques, and let your creativity flow. With practice and patience, you’ll be creating breathtaking henna designs in no time. So, gather your supplies, prepare your paste, and embark on your henna journey today!
